 |
| Mortise and Tenon |
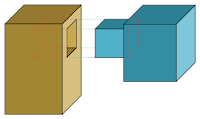
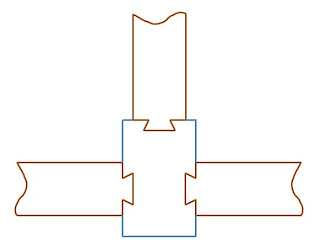
For this project, I've decided to use sliding dovetails to interlock the walls together. Their shape resists any horizontal movement which would cause racking. Besides, I'm not that great at cutting mortises anyway.
 |
| End view of a Sliding Dovetail |

Sliding dovetails can be efficiently cut on a router table but the fence position and bit height is critical. Determining the fence position is a trail and error process. Centering the tail and getting the tail width just right can be tasking. When cutting the slot for the pin, using a straight bit to remove a portion of the material makes a cleaner cut when following it up with the dovetail bit.
Returning the Fence to Positions Accurately
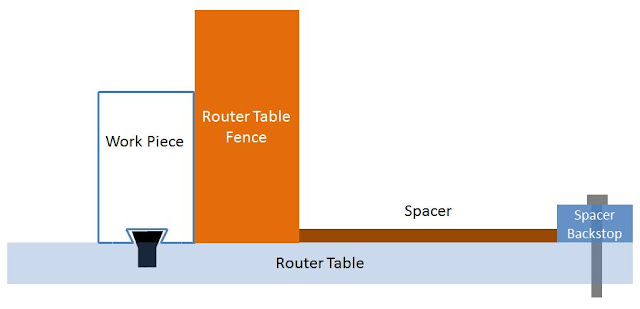
After spending a considerable amount of time determining a fence position for a pin or a tail, this technique will allow the fence to return to those positions. To accomplish this, we need to reference the position of the fence to a fixed reference. The spacer backstop is this reference and is simply a 1.5" wide piece of scrap wood that is mounted flush to the back of the router table. A spacer, also made of scrap wood, is used to position the router table fence at a desired position.
I usually start this process with the cutting the pin. A pin is a profile cut into a work piece with a shape that will accommodate a dovetail-shaped tail. A tail is this shape, usually formed with a router bit with a 14° cutting angle. For each width work piece, a custom length spacer needs to be created.
 |
| Routing Pins |
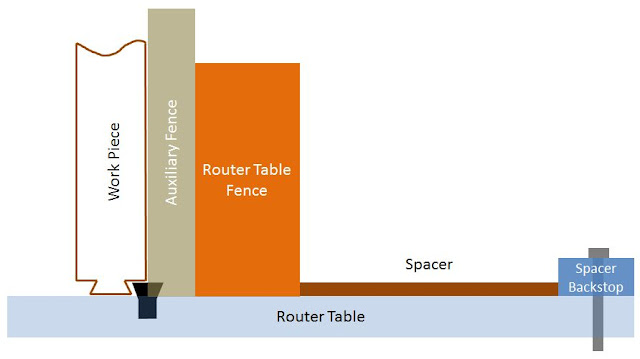
The same jig works for cutting pins, however an auxiliary fence is added. This is a piece of scrape wood surrounds the router bit and supports the wood fibers as the cut is being made to prevent a rough edge on the work piece. Be sure to keep this auxiliary fence because the spacers you will be cutting are dependent on it. To determine the correct length of the spacer, pick a fence position that you guess is the right distance from the router bit. Cut a scrape piece that is exactly the same width as your work piece and rout both sides. The resulting tail on the scrape piece should fit snugly in the pin grove. If you must use significant force, any glue upon the tail will be wiped off on assembly and the joint won't be secure.
Cutting the Tail Spacer
Cut a new spacer on your tablesaw that will fit between the fence and the spacer backstop, loosen the fence, insert the spacer, move the fence against it and tighten the fence. You will now verify again the the tail width is correct. DON'T MOVE YOUR TABLESAW FENCE. Just flip the scrap piece over, cut a new tail, and test it in the pin grove. If it is too loose, the spacer needs to be slightly shortened. Lightly tap the fence on your tablesaw to make this adjustment, remove and re-cut the spacer, and try again until the desired tail width is obtained. If the joint is too tight then the spacer is too short, cut a new slightly longer spacer and repeat the process.When the spacer is the correct length, label it as to its purpose.
 |
| Routing Tails |
Summary
So now you have created custom length spacers (and an auxiliary fence) that will allow you to create sliding tails and pins for your furniture or cabinetry. As an alternative to mortise and tenon, sliding dovetails allow easy modular expansion of cabinetry without tenons. Out of the container, glues are too thick for sliding dovetails, so I recommend diluting glues with water. According to Franklin, Titebond II can be thinned with water by 5% without any weakening of adhesion strength.


No comments:
Post a Comment